
How to decorate a wedding venue with high ceilings
Choose whether to ground the room or emphasize its height, then plan floor, eye-level, and approved overhead decor without relying on rigging.
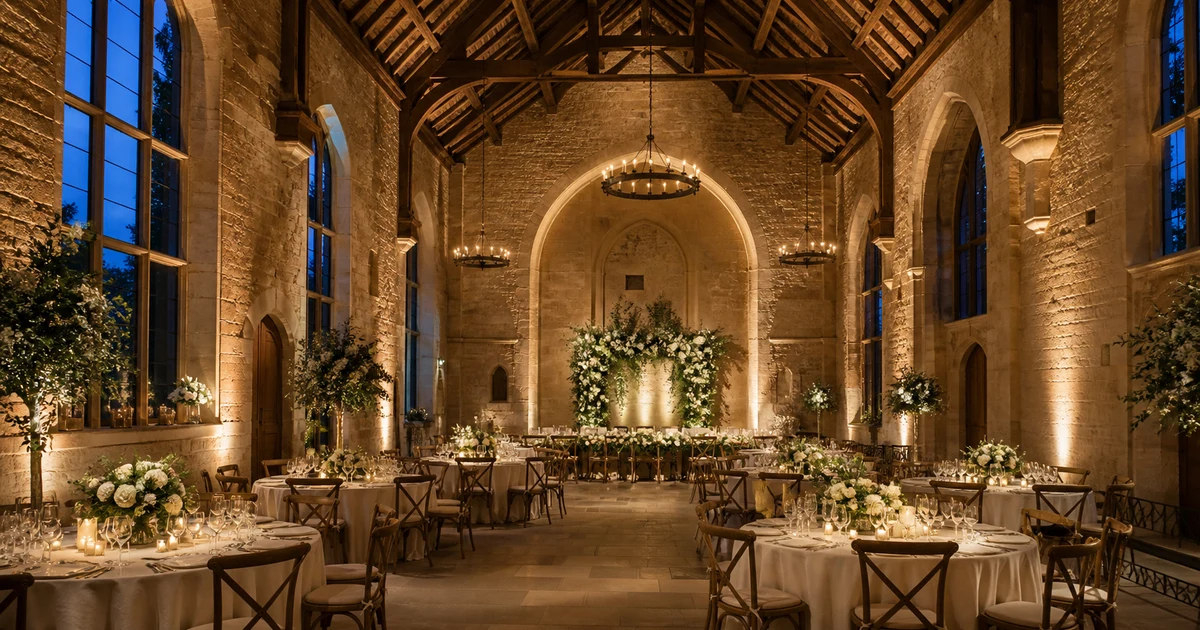
To decorate a wedding venue with high ceilings, first decide whether to ground the room around the guests or emphasize the height. Build the design in three layers: floor-level focal areas and furniture groupings, eye-level arrangements and repeated details, and an optional overhead layer. Do not make suspended decor the foundation of the plan until the venue has approved the method, installer, access, timing, and removal in writing.
A high ceiling is not automatically a problem. Sometimes the beams, windows, chandeliers, or open volume are the reason the room works. The decor feels small only when the important guest areas have no visual weight or when every detail sits at the same low level. The answer may be one strong floor-supported focal point and a repeated table detail. It may be a supplier-designed overhead treatment. Those are different plans with different approval paths.
Decide whether to ground the room or emphasize the height
Stand where guests will enter, sit, hear speeches, and dance. Ask what you want their attention to do.
Choose ground the room when the ceiling is visually weak, the occupied zones feel scattered, or the ceremony, tables, and dance floor disappear into the volume. The design should bring attention back to people and the parts of the room they use.
Choose emphasize the height when the architecture is worth seeing. A vaulted timber roof, tall windows, columns, or existing chandeliers may need a clear visual connection to the guest area, not a disguise.
You can combine the directions, but give them a hierarchy. One focal zone might use the height while dining areas stay visually grounded. If every table, wall, entrance, and ceiling bay competes for equal attention, the room still lacks a plan. It just has more objects in it.
Audit the room before choosing tall decor
Take wide photographs from the guest views and record the current room rather than the empty space around it. Note:
- useful ceiling architecture, windows, columns, beams, and installed fixtures;
- ceremony, dining, speech, dancing, entrance, and service zones;
- the furniture and lighting included in the current package;
- what appears behind people in planned photographs;
- any suspended feature, wall treatment, or tall arrangement you are considering;
- which attachment, rigging, ladder or lift access, power, supplier, setup, and removal questions remain unanswered.
The final line is not a technical checklist. It is a hold list. A saved image cannot prove that a ceiling point exists, and a venue photograph cannot tell you who may use access equipment.
The Knot’s venue-type decor guide recommends venue or planner approval before changing the space. For large rooms with high ceilings, it points to tall centerpieces, large tables, uplighting, and repeated details. That is useful visual vocabulary. It does not tell you which of those choices fits your room or how a physical installation should be built.
If you still need to rank the room’s zones, use the blank-canvas venue method first. The rest of this guide assumes you already know where the wedding’s important moments happen.
Use a floor, eye-level, and overhead decision matrix
Work from the guests upward. Complete the floor and eye-level rows before deciding whether the ceiling needs anything.
| Layer | If you want to ground the room | If you want to emphasize height | Record before keeping the idea |
|---|---|---|---|
| Floor | Define occupied zones with furniture groups, floor-supported focal points, planters, plinths, or other permitted self-supporting elements | Give the eye a clear starting point beneath the vertical feature | Zone, footprint, support, supplier, delivery, setup, movement, removal |
| Eye level | Give tables and focal areas more visual weight through arrangements, textiles, backdrops, signs, or repeated detail | Repeat a shape, material, color, or line that connects the guest area with the architecture | Guest and camera view, table layout, sightlines, dimensions, supplier, reuse |
| Perimeter and installed light | Use the approved existing system or a restrained perimeter treatment to keep attention within the occupied part of the room | Reveal columns, beams, windows, or wall height without adding a suspended object | Existing fixtures, control, position, power, operator, timing, fallback |
| Overhead | Add only if the lower layers leave a specific visual problem | Use one approved treatment to draw attention to worthwhile height or a focal zone | Visual job, item, position, method, installer, access, power, setup, removal, written approval |
This matrix is an original planning tool, not a formula for proportion or a technical specification. It does not decide dimensions, structural capacity, attachment, rigging, access, power, installation, or permission.
Build the floor layer around occupied zones
Start with the ceremony focal area, tables, speeches, dancing, or another zone guests actually use. A floor-supported backdrop, a furniture grouping, a pair of arrangements, or a defined stage area can give that zone enough weight without touching the ceiling.
Floor-supported does not mean automatically allowed. Large items still need a known footprint, support method, route, setup owner, and removal plan. The venue and responsible supplier must decide whether the real item fits the site.
Use eye-level repetition to connect the room
One tall centerpiece in a large room can look isolated. A repeated material, shape, color, or line can connect tables and focal areas without making every arrangement tall. The repetition might appear in a mix of high and low arrangements, textiles, table lighting, freestanding frames, or the edges of important zones.
Repetition is doing navigation work here. It gives the eye a route around the occupied part of the room. It should not turn into a requirement to decorate every table, column, and doorway.
Ethereal Creators’ high-ceiling guide uses taller arrangements, plinths, layered lighting, focal points, and ceiling treatments in its professional work. Its examples show several ways to connect the lower and upper parts of a room. They do not make any one approach mandatory.
Use light as a separate supplier decision
Lighting can support either direction. Perimeter light may bring attention to walls or columns. Focused light may help one table, stage, or arrangement read against the room. Existing chandeliers may already give the ceiling enough presence.
Do not turn those possibilities into fixture counts or a power plan from an article. Use the wedding reception lighting decision matrix to define the visual job, then give the venue and responsible lighting supplier the current layout, installed system, control needs, access, setup window, and fallback.
Build a complete plan without rigging
Your plan should still work when the overhead row is deleted. That is not the lesser version. It is the version that protects the visual idea from one unresolved permission.
For a grounded room, combine:
- one or two floor-supported focal areas in the highest-attention zones;
- enough eye-level detail to connect tables or moments;
- the venue’s useful furniture and installed fixtures;
- approved perimeter or focused lighting where the room needs it;
- a clear setup, reuse, and removal owner for every kept item.
For a room whose ceiling is worth emphasizing, frame the height from below. Position the ceremony, couple’s table, stage, dance floor, or another important zone where the architecture already has visual strength. Repeat one line, material, or color upward through approved floor and eye-level pieces. Let the ceiling remain visible.
This approach is often more coherent than adding a suspended object merely because the room is tall. The design has a point of view even if the overhead scope is declined.
For a broader set of floor-supported alternatives, use the guide to decorating when you cannot hang anything.
Treat overhead decor as an approval branch
If the lower layers still leave a named visual problem, ask whether an overhead treatment is possible. Keep the question specific:
- What item and exact location are being proposed?
- May anything be suspended there, and who can approve it?
- What support or rigging method would the responsible supplier propose?
- Who may install it and use the required access equipment?
- What documents, power arrangements, setup time, removal time, and fees apply?
- What is the floor-and-eye-level fallback if any part is declined?
Lynnwood Event Center’s wedding guidelines show how specific one venue’s answer can be. Lynnwood requires review before banners are suspended, reserves its available ladders for Event Center staff, may charge for hanging services, and requires an outside vendor when decor needs rigging. Outside-company decor must arrive and leave within the contracted event time.
Those are Lynnwood’s rules, not a template for another venue. Their value is the set of decisions they expose: review, method, installer, access, cost, timing, and removal. Record the current answer from your own venue.
Use the wedding venue decor restrictions checklist to capture the written decision. If the answer is no or still pending, remove the overhead layer. Do not replace an approved rigging process with tape, wire, a borrowed ladder, or another improvised method.
Where NuptiaAI fits
NuptiaAI is an iPhone wedding-venue visualizer. It can use a ceremony or reception photo with style, colors, event details, season, time, budget tier, flowers, and special requests.
Once the three-layer plan exists, use the same source photo to compare two controlled directions. One request can keep the focus around the floor and tables with no suspended decor. Another can emphasize an existing architectural feature or describe only the overhead treatment the venue has approved.
Treat both results as concepts. A generated image can invent an attachment, remove a fixture, change a ceiling, hide access equipment, or alter the room layout. NuptiaAI cannot measure the ceiling, inspect support points, calculate loads, specify rigging, approve access, plan installation, confirm venue permission, or determine price. Audit the result against the source photograph and written approval record before it reaches a supplier.
Frequently asked questions
How do I make a high-ceiling wedding venue feel more intimate?
Bring the visual hierarchy back to the zones guests occupy. Define the ceremony, tables, speeches, dancing, or lounge area with floor-supported focal points, furniture groupings, eye-level repetition, and approved lighting. You do not have to hide the ceiling. You need the guest areas to read clearly against it.
Do tall centerpieces work in a high-ceiling venue?
They can be one way to connect table level with the room’s vertical scale, but they are not a default requirement. Compare them with the table layout, guest and camera views, the rest of the eye-level layer, and the supplier’s real proposal. The responsible venue and supplier must settle dimensions, stability, placement, setup, and removal.
What can I do if the venue does not allow hanging decor?
Finish the plan with floor-supported focal areas, stronger table or eye-level detail, furniture-defined zones, useful existing architecture, and venue-approved lighting. Keep the visual job that the overhead idea was meant to perform, then solve it from a permitted layer instead.
How do I know whether ceiling decor is worth it?
Name the visual problem first. If the floor, eye-level, perimeter, and installed-light layers already give the room a clear hierarchy, the ceiling may not need another treatment. If an overhead idea solves a distinct problem, compare its approved supplier scope, access, setup, removal, and fallback with the effect you expect. Do not decide from a gallery image alone.
Use the NuptiaAI wedding decor guides to compare the visual direction, then keep the approved three-layer plan beside the venue rules and supplier brief.